¶ Locations for Packages
Beginning 4/26/2021 Metrc support will unveil new software functionality requiring packages to have a location assigned in Metrc whenever creating a package from a harvest, repackaging into a new package tag or receiving packages on an incoming transfer manifest. This functionality allows for more precision for the location of a package on your licensed premises in CTS.
For some licensed facilities, locations have already been used as a way to track plants and harvests at the facility. This added functionality allows for that same tracking to be used for packages at all facilities.
Starting 4/26/2021, licensees will need to have locations added at their facility.
NOTE: Whenever new functionality is added, the employee that is designated as the Industry Admin is the only one with the permissions initially enabled. The Industry Admin can then give those permissions to other users in your employee list. You'll need to add package location permissions to any employee whom you wish to be able to change package locations in your facility.
A minimum of 1 location is required in order to accept packages, create packages from a harvest, or repackage into a new package tag starting on this date. In order to create a location you will need to follow the following steps:
Step 1: Log into Metrc, Click on Admin, and then select Locations from the menu:

Step 2: On the locations screen, click on “Add Locations”:

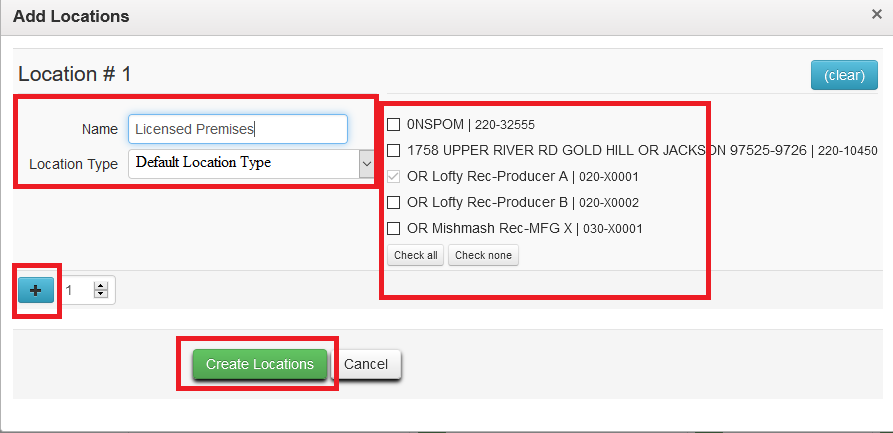
Step 3: A pop up window will appear allowing you to create a location. For this step you can be as general or specific as you want. If you have a specific room that you store all dried and cured bud, such as at a producer license, then you could call it storage room or something similar. But you can also be general and just call the location “Licensed Premises”, “Store” or something similar to that as well. In this example, we will call the location our Licensed Premises:
If you have multiple licenses, each license will be listed on the right side of the location name input box, allowing you to create the same location at multiple licenses.
Make sure to select a location type for the location as “Default Location Type”.
If you want to create multiple locations at your licensed premises you can click on the blue “+” symbol to add additional locations.
Once you’ve named the locations you wish to create click on the “Create Locations Button”.
The location will appear in your locations list and is ready for use.

Step 4: Repackaging using the New Location Feature
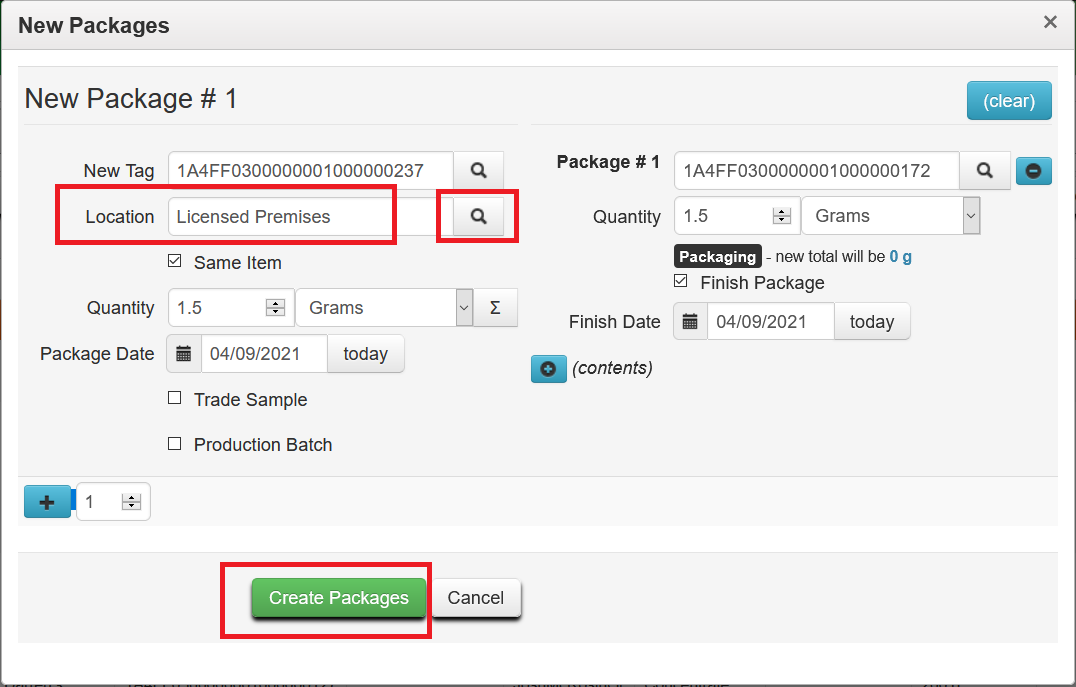
When the functionality goes live you’ll need to assign a location to any package that you repackage into a new tag. To do so, go to your packages section, click on the active packages tab, and then find the package you want to repackage. Click to highlight it and then click on “New Packages”:

The Repackage screen will appear and will have a section to fill in for the package’s location. Fill in all the relevant information for the package: Quantity, New tag, etc. When selecting a location you can either begin typing in the name of the location and select it from the drop down menu, or click on the magnifying glass icon and select the location from the list.

Once all the information is filled in, click on “Create Packages”.
You’ll now see the package with a new tag assigned in the location that you specified.

Step 5: Receiving packages on a manifest and assigning a location.
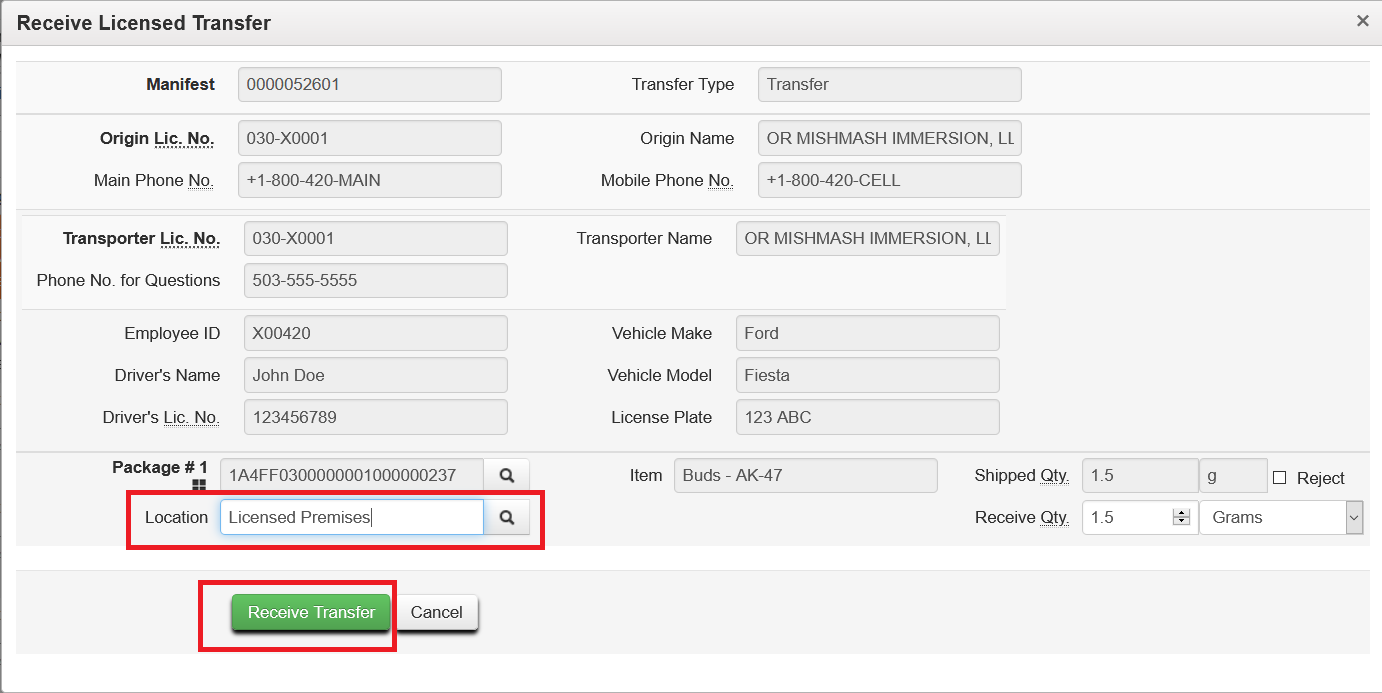
When you receive a transfer on or after the implementation date, you’ll need to assign a location for the package upon receipt. You can either type in the location name or select the location from the list of locations by clicking the magnifying glass icon. Once you’ve confirmed the packages and assigned them a location, click the green “Receive Transfer” button.

Remember: You can be as specific or general as you’d like for your package locations, but the information in CTS is required to be accurate under OLCC Rules.